Teams workspace - additional features
Folders and files imported to the Teams workspace
When you enter the new Teams workspace mode, you will see only one channel: General. Each channel has a Files tab where you can save and create files and export files shared on the channel. If you have copied folders to the SharePoint file library of Teams workspace, you will not see the files in Teams team mode. You must move the files to the General channel folder, or you can create folders with the same name in Teams team mode as in the SharePoint root folder to display the files in Teams team mode. You can also link the entire SharePoint file library as a separate tab to the channel.
I want all uploaded files in the General channel folder
- Click the Open in SharePoint button in the Teams space General channels Files tab

- Browser will open SharePoint File Library
- Click the Document link in the left navigation
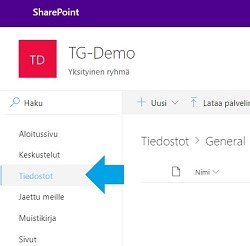
- Select all folders and files, except the General folder, that you want to move to the General channel folder
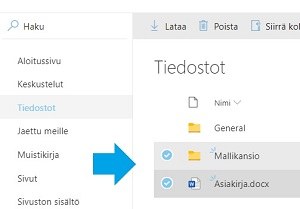
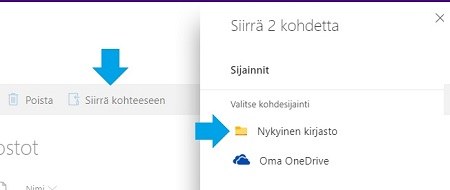
- Click Move to button
- Select Current Library and then General folder
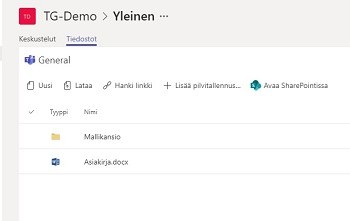
- Selected folders and files are moved under the General folder
- Files will also now appear in Teams spaces’ General channels’ Files tab
I want my folders in SharePoint file library at the root level to be in their own channels
- Click the Open in SharePoint button in the General channels Files tab.

- Browser will open SharePoint File Library.
- Click the Document link in the left navigation.

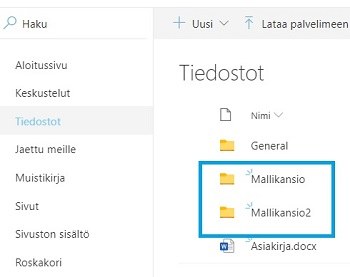
- Check first names of the root folders in the files library.
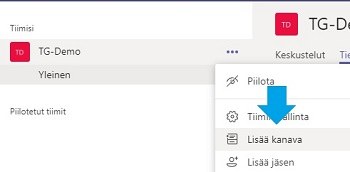
- Open Teams space and click the menu button (three dots) to the right of the team name and select Add Channel.
- Name the channel so that it’s going to be named as one of the root folders.

- Files are now represented in the channels’ Files tab.
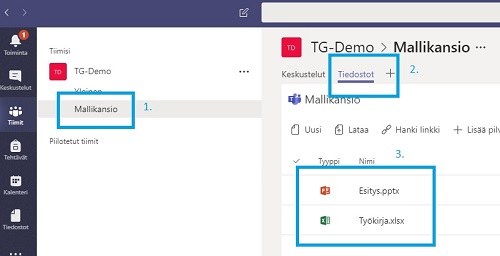
- Do the same for other root folders.
I want to link the entire file library to a channel as a single tab
- Open Teams Team Mode and the channel to which you want to add the entire file library.
- Click the + button in the tab row

- Select Document Library
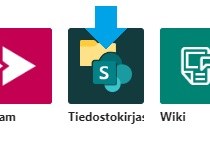
- Select the SharePoint site that matches the group name from the list and click Next
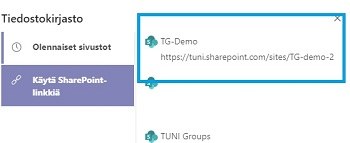
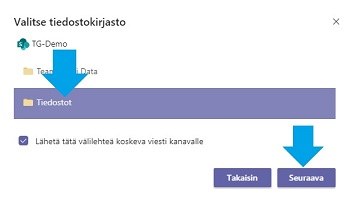
- Select Documents
- You can rename the tab if you want
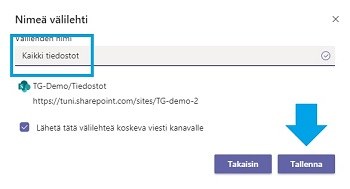
- Click Save button
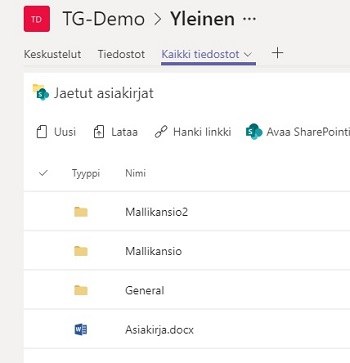
- The whole file library will appear on the tab
Enable Teams sync
Synchronization is intended for offline working, so if you work with a good internet connection, there is no reason to use this.
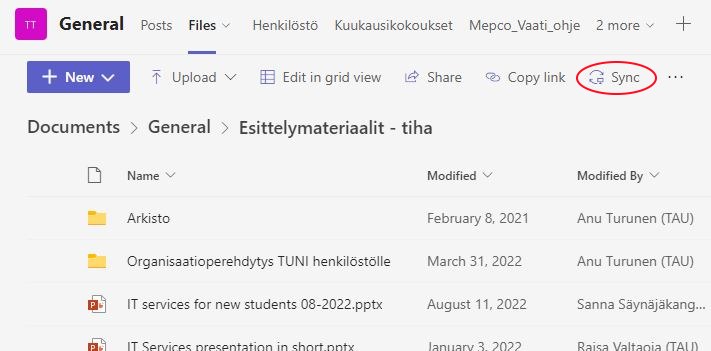
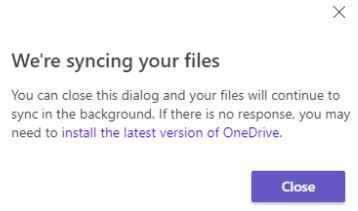
In Teams, go to the channel you want to sync to your computer and select the Files tab at the top. You can sync the whole channel or you can just select a folder. Click Sync. You will receive notifications from Teams and OneDrive that synchronization is enabled. The function copies a copy of the files in the folder to your computer.
If you want to stop syncing any Teams file folder to your computer, you can do it like this:
- Click the OneDrive icon (blue cloud) on the right side of your computer's taskbar and the stroller image in the upper corner of the window that opens.
- Select Settings from the drop-down menu.
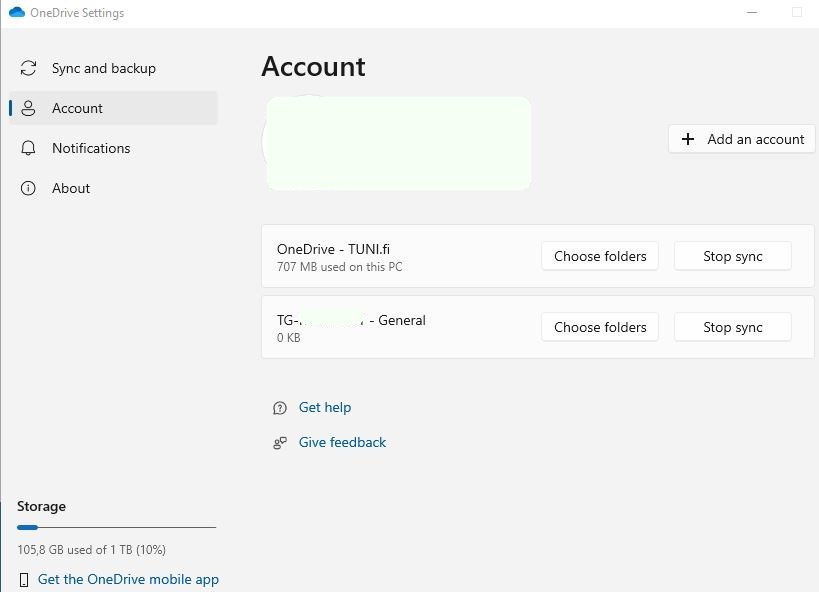
- Click the Account tab
- If you want to stop synchronizing a TG group channel, click Stop sync next to it. In this case, they stop synchronizing with Teams and they disappear from the Resource Manager where they used to appear. They do not leave the computer, but can only be found under the user's profile information.
- If you want to stop synchronizing a folder in the TG group, click Choose Folders next to the group and remove the tick next to the folder. After this, the folder will be removed from your computer, but will of course remain in Teams.
- If you want to delete a TG group synchronized to your computer, you have to do it manually after this from the Resource Manager in the user's profile.
IT Helpdesk
0294 520 500
it-helpdesk [at] tuni.fi (it-helpdesk[at]tuni[dot]fi)
helpdesk.tuni.fi